
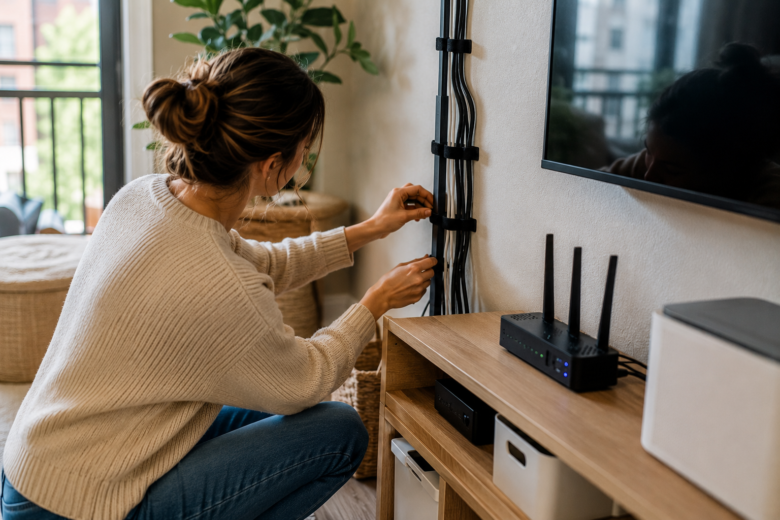
The TV is set up, the internet is working, the gaming console is connected, chargers are everywhere, and suddenly, your living room has more cables than you expected.
In a rental apartment, organizing those wires requires a little extra planning. Drilling holes, installing permanent cable channels, or modifying walls may not be allowed under your lease. And a solution designed simply to hide cables could leave marks when it’s time to move out.
The good news is that you can create an organized, functional, and visually clean setup without making permanent changes to your apartment walls.
The key is to plan cable routes, eliminate unnecessary clutter, and choose removable solutions that are appropriate for the surfaces in your rental.
Start by Identifying Everything That Needs to Be Connected
Before buying cable organizers, take inventory of your electronics.
Around your TV, for example, you might have a:
- television;
- streaming device;
- gaming console;
- soundbar;
- modem or router;
- chargers;
- lamps;
- other devices.
Identify which devices need power and which also require data, HDMI, or Ethernet cables.
Then locate your electrical outlets and internet connections.
This quick inventory prevents you from organizing each cable separately when several of them could follow the same route.
Choose the Position of Your Electronics Before Hiding the Cables
Don’t start installing clips or organizers while you’re still deciding where each device will go.
First, determine the position of your TV, TV stand, modem, router, and other electronics.
Then check whether the original cables can reach their connections without being stretched too tightly.
Whenever possible, position devices closer to the connections they use.
Moving a piece of furniture just a few inches may eliminate the need to run a cable across an entire area.
In a rental, a smart layout can solve problems that no cable organizer could solve as effectively.
Separate Cables by Function
When multiple cords are tangled together, making even one small change can become a frustrating puzzle.
Group cables according to the device or function.
For example:
TV: power + HDMI
Router: power + internet
Gaming console: power + HDMI
Soundbar: power + audio connection
You can also use small removable labels near the ends of the cables.
This makes it much easier to disconnect one device or rearrange your setup later.
The goal isn’t just to make everything look better. It’s to create a system that will still be easy to understand several months from now.
Use Your Furniture to Hide Cables
Before attaching anything to a wall, look at your furniture.
TV stands, consoles, desks, and bookcases can naturally conceal a large portion of your cables.
Cords can often run discreetly along the back of furniture, as long as they aren’t pinched, bent too tightly, or placed where they could be damaged.
Cable organizers can also sometimes be attached or positioned directly on furniture when both the product and surface are compatible.
This strategy reduces the amount of material you need to apply directly to your apartment walls.
Use Removable Adhesive Solutions Carefully
Adhesive cable clips and some cable-management systems can help guide wires along surfaces without drilling.
But “removable” doesn’t automatically mean “safe for every wall.”
Before using an adhesive product:
- read the manufacturer’s instructions;
- check which surfaces are compatible;
- follow the stated weight limits;
- avoid fragile or deteriorated surfaces;
- follow the correct removal procedure.
Different paints, textures, and finishes can react differently to adhesives.
If you’re unsure, consider routing cables through furniture instead or check your property’s rules.
Consider Removable Cable Raceways Only When Appropriate
Cable raceways can create a cleaner path for visible wires, especially between a piece of furniture and a nearby outlet.
However, some models use strong adhesives.
Before installing a raceway on a wall, confirm that the product is appropriate for the surface and that this type of installation is allowed in your apartment.
Don’t choose a solution simply because the package says it’s removable.
Think about what will happen when you eventually need to take it down.
In a rental, the best temporary solution is one that’s also designed with removal in mind.
Manage Extra Cable Length Instead of Leaving It on the Floor
Long cables can create messy piles behind a TV or desk.
Use reusable cable ties or appropriate organizers to keep excess length neatly grouped.
Avoid overtightening cables or creating sharp bends.
Don’t hide adapters or equipment that require ventilation inside unsuitable spaces simply to improve appearance.
Organization should never compromise the performance or safety of your devices.
Keep Power Strips and Adapters Out of the Way
Power strips can help consolidate several connections in one area, but they should always be used according to their specifications.
Don’t overload a power strip, and don’t connect high-power devices without confirming that the product is appropriate for that use.
Keep electrical connections away from water and places where they could be stepped on or hit during cleaning.
If you notice outlets that are damaged, loose, or show signs of overheating, don’t try to work around the problem with extension cords.
Report the issue to property management.
Create Cable Routes That Stay Out of Walkways
A cable may be perfectly hidden behind furniture but still become a problem if it crosses a walkway on its way to an outlet.
Pay special attention to:
- doorways;
- hallways;
- the space between the sofa and TV;
- areas around chairs;
- places where you regularly vacuum.
Whenever possible, keep cables close to furniture and away from walking paths.
Avoid running cords under rugs or carpets unless the cable or manufacturer specifically indicates that this type of use is appropriate.
Do a Final Check Before Calling the Setup Finished
Once everything is organized, step back and look at the room from a distance.
Make sure:
- no cable is stretched too tightly;
- individual cables can still be identified;
- no loose cords cross walkways;
- electronics have adequate ventilation;
- any adhesives used are compatible with the surface;
- power strips are being used correctly;
- the setup can be removed without permanent changes.
Take a photo.
It can serve as a reference if you ever need to disconnect and rebuild the setup.
An Organized Home Works Better Down to the Smallest Details
Organizing cables doesn’t mean making every wire completely disappear.
It means making sure they stop controlling the room.
When every cable has a clear route, electronics become easier to identify, cleaning gets simpler, and your living room or home office looks significantly more organized.
There’s another advantage that’s especially important for renters: you can improve the space without treating it as though it permanently belongs to you.
When your next move arrives, the electronics can go with you, the organizers can come down, and the walls can remain the way they’re supposed to be.
Because a rental apartment may be temporary.
But that doesn’t mean it ever has to feel improvised.


Comments
Moving into a rental really makes you appreciate removable hooks, storage baskets and anything that doesn’t require drilling holes 😂
Author
hahahaha it’s perfect!!