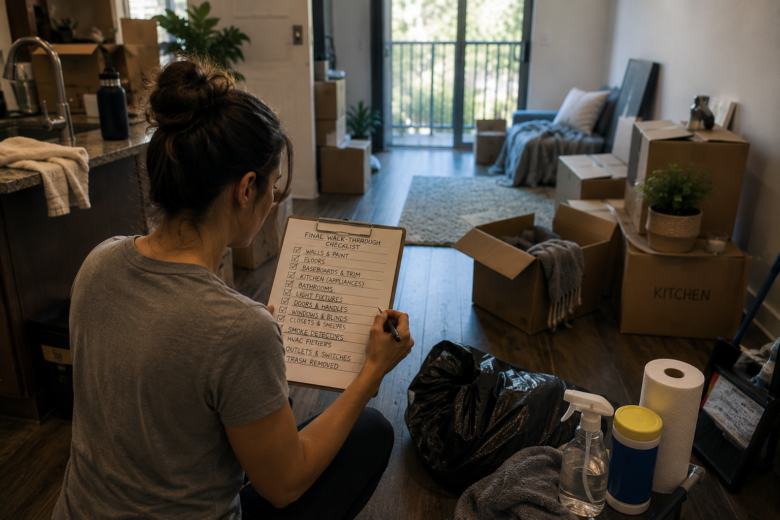
The last week in a rental apartment is usually a mix of moving boxes, address changes, service cancellations, and the feeling that you’re still forgetting something.
In the middle of all that chaos, the move-out inspection can easily become something you only think about on the final day.
That’s an unnecessary risk.
Once the furniture is gone, small details that were hidden for months suddenly become visible again: a mark behind the sofa, residue inside a cabinet, something forgotten on the balcony, or a light bulb that stopped working.
Your final week should be a strategic review of the property.
The goal isn’t to make a lived-in apartment look brand new. It’s to meet the requirements of your lease, address what is actually your responsibility, and document the condition in which you’re returning the unit.
Start by Reviewing Your Move-Out Instructions
Before buying cleaning supplies or attempting any repairs, review your lease and any move-out instructions provided by property management.
Look for requirements related to:
- cleaning;
- removal of belongings;
- walls;
- carpets and flooring;
- key return;
- provided appliances and equipment;
- trash disposal;
- final inspection;
- security deposit procedures.
Some properties provide a specific move-out checklist.
Use that document as your primary guide.
Security deposit and deduction rules can also vary depending on applicable law, so don’t assume that previous rental experiences or general advice override your current lease.
Compare the Apartment With Your Move-In Inventory
Remember the photos you took when you received the keys?
Now they become especially valuable.
Open your move-in inventory and walk through the apartment while comparing its current condition with your original records.
Pay particular attention to:
- walls;
- doors;
- floors;
- carpets;
- countertops;
- cabinets;
- property-provided appliances.
This can help distinguish a condition that already existed from something that happened during your tenancy.
Keep records of maintenance issues reported throughout your lease accessible as well.
Do a Second Inspection After the Furniture Is Gone
Don’t consider your review complete while furniture is still covering walls and floors.
Once the bed, sofa, tables, and dressers have been removed, walk through the property again.
Look for marks, forgotten belongings, residue, and damage that may have been hidden.
Pay special attention to areas where furniture remained for long periods.
If you’re using professional movers, inspect the apartment after they finish too.
Moving furniture can leave marks on doors, walls, and floors during the final minutes of your tenancy.
Review Walls Doors and Baseboards
Inspect every room in good lighting.
Look for dirt, marks, and changes that may need attention according to your property’s rules.
If you installed pictures, shelves, or other items, review the move-out instructions before deciding how to handle holes or modifications.
Don’t improvise repairs or try to match paint unless you know exactly what finish was used.
A poorly executed repair can become more noticeable than the original problem.
Also check doors, handles, and baseboards for damage you may not have noticed before.
Clean From Top to Bottom
Approach the final cleaning systematically.
Start with higher surfaces and leave the floors for last.
In the kitchen, review the:
- inside of cabinets and drawers;
- countertops;
- sink;
- stovetop;
- oven;
- refrigerator;
- dishwasher;
- backsplash.
In the bathroom, check the sink, mirror, toilet, bathtub or shower, cabinets, and other surfaces.
Use products appropriate for each material and follow manufacturer instructions.
Don’t leave deep cleaning until just a few hours before returning the keys.
Inspect Floors and Carpets Once the Apartment Is Empty
With every room cleared, examine the entire floor surface.
Look for stains, residue, small objects, and areas that need additional cleaning.
Don’t try to hide damage with rugs or belongings left behind.
If your move-out instructions require a specific procedure for carpets or flooring, follow those requirements carefully.
Avoid aggressive last-minute treatments that could alter the surface.
Sometimes trying to remove a small stain with the wrong product creates a much larger problem.
Don’t Leave Anything Behind Without Permission
That leftover can of paint, shelf that “the next tenant might use,” or collection of cleaning products may seem helpful.
To property management, they may simply be items that need to be removed.
Check the:
- closets;
- cabinets;
- balcony;
- storage unit;
- garage, when applicable;
- refrigerator;
- areas under sinks.
Remove your belongings and dispose of everything according to the property’s rules.
If you’d like to leave something behind, get permission first.
Check Everything That Belongs to the Apartment
Before the inspection, confirm that everything originally provided with the unit is still there.
This may include remotes, accessories, equipment, or other items documented at move-in.
Don’t replace missing or damaged components on your own without checking property management’s instructions.
If something is broken or missing, it’s better to know before the inspection than to discover it during the walkthrough.
Create Your Move-Out Photo Record
Once the apartment is completely empty and clean, photograph it again.
Whenever possible, recreate the same angles you used for your move-in photos.
Document:
- every room;
- walls;
- floors;
- carpets;
- kitchen;
- bathrooms;
- closets;
- appliances;
- doors and windows.
Record a slow walkthrough video as well.
Keep the original files together with your move-in inventory, lease, and relevant communications.
Checklist for the Final 24 Hours
Before returning the keys, make sure you’ve:
- completely emptied the apartment;
- finished the final cleaning;
- checked cabinets and closets;
- inspected floors and carpets;
- confirmed provided items are present;
- removed all trash;
- taken photos and videos;
- reviewed key-return instructions;
- saved important records;
- updated your forwarding address when requested.
Returning the Keys Starts Long Before You Close the Door
Your final week doesn’t need to become a desperate race to make the apartment look untouched.
It should be a review.
Compare, clean, empty, inspect, and document.
The more organized this process is, the less you’ll have to rely on memory if questions about the property’s condition come up later.
You can’t control every decision involving your security deposit.
But you can control how you return the apartment and the records you keep of that condition.
And after carrying out the last box, taking the final photos, and returning the keys, there’s a certain peace of mind that comes from knowing you didn’t simply close the door.
You closed that chapter with everything properly checked.